

Setting Up Centers for Success in Kindergarten: Center time is my favorite time of the whole day and it is a HUGE hit with my students as well. Let me try to walk you through setting up centers for kindergarten success. I want to help make learning centers in the classroom fun and engaging.
WHAT ARE CENTERS?
Many people call center time for many different things. Essentially, center time for me and in my classroom is a time for students to work independently to skill build. I use this time to allow students to work on skills they need extra practice. Additionally, center time is a great time to assess students on some skills such as handwriting, matching letters to sounds, counting sets and writing the amount, etc. When we walk thru how to set up learning centers can be fun and they should not be overwhelming. We want your learners to have success with centers.
HOW TO ORGANIZE A CENTER CHART
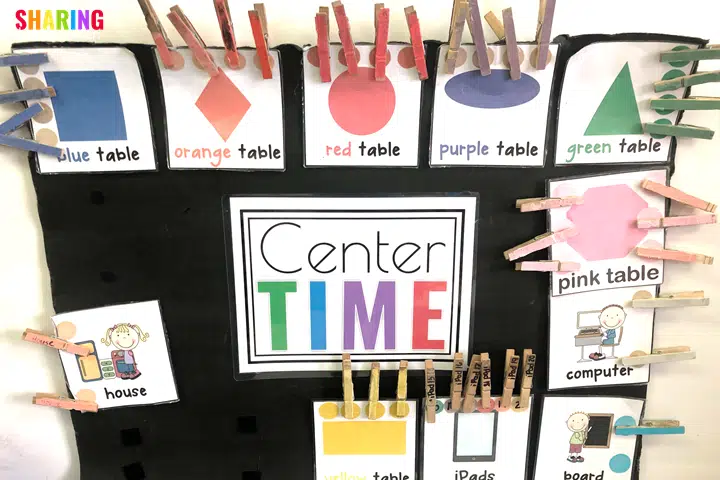
Setting up centers for Kindergarten success can be easy. First, I make a center chart to organize all the stations I will have throughout the year. You can see an image of my center chart above. I have a spot for each center, but each area is attached using Velcro so I can take them off at the beginning of the school year and add them one center at a time. Also, I can remove centers as needed.
-
 Center Chart$6.00
 -

-
 Schedule Cards EDITABLE$4.00
Durable Center Clips for Setting Up Centers for Success
Now that I have a center chart, I need to make clips for my students. The clips are for my students to clip to their shirts to control how many people can go to each center at a time and help the flow of center time.

This past year I learned how to create the most durable center clips ever by using Mod Podge. Click on the picture or {here} to learn how I made these clips.
Next, here is an important tip. I always make a few extra clips because they break or get lost throughout the year. Additionally, save yourself time and effort and make extra clips at the beginning and store them in a safe place. This is a HUGE time saver when setting up centers for Kindergarten success.

EACH CLIP HAS A HOME
Then, I make sure each center clip has a “home.” I want my chart to be the easiest to use and manage, so if each clip has a home… I know if a clip is missing and so do my students. What I mean by a home is a colored circle on each center card indicating where the clips go, how many clips belong there, and therefore how many clips are missing. All my work centers (which are my colored tables) have 4 clips and all my play centers have 2 clips. I also recommend making each center a different color. I use construction paper or card stock to make sure each place has its own color.
HOW TO START CENTERS
Now that we have set up centers for Kindergarten success with a chart. But now we need to get students into these centers successfully. The first week of school I only have 6 stations open, the colored tables. I put something fun at each station and let my students practice using clips and the chart. I stand by the center chart and help my kids get and change out clips. They have to know to put each clip away and get a new clip.
I also try to manage tables, making sure each student has on the right clip when they are at the right table. She also has to make sure students stay at their tables and not get distracted by others playing at a different table. My kids like to “switch” tables without switching clips. We have to work on this.
Don’t FORGET TO CLEAN UP
We also have to work on cleaning up our centers and returning clips at the end of our time. Cleaning up their table or area, the supplies, and returning the clip to the chart is a vital procedure you need to teach your students. Knowing how to clean up is critical in Setting Up Centers for Success.
ADD SOME FUN CENTERS
Once we master this for a few days… I add one fun center-like kitchen. Of course, each kid wants to go there, so we have to make sure each kid gets a turn. Then, we add another fun center like art. Once each student rotates through that center, we can add another fun center like sand.
EXTRA CENTER TIME SUCCESS TIPS & TRICKS
I want to make sure each student KNOWS what is expected from the fun centers before another one gets open. Since my class already knows how to work the clips and stay in our area, so now we work on completing our activity at each table, raising our hands to be checked off, and letting our teacher cross our names off the list. This is a big component in setting centers up for Kindergarten success.
My kids usually struggle with waiting for me to check them off. They do the activity and leave the area! Oh no! Good thing all my stations this week are pretty simple to help them do it again easily if needed. I would rather them learn this lesson now.
Types of Centers for Setting Up Centers for Success
Now, let me explain the types of centers I have. Each colored table in my room (yellow, orange, red, purple, blue, green) is my workstation. There is one activity at each table each week that my students are required to complete.
I also have LOTS of fun centers like kitchen, art, sand, legos, cards, teacher, computers, train, and lots more! These are my time fillers for my work centers. I add them one at a time.
These centers are in specific locations in my classroom and do not move. But… as ALL my students finish a particular work center for that week, I take away that activity and put out a FUN activity like coloring, iPads, dinosaurs, blocks, and other table-based activities. I usually let the last student(s) that go to that center pick the fun activity that will replace the work.
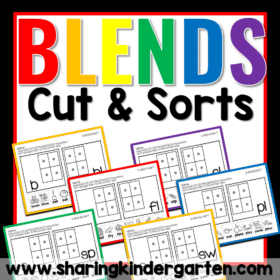
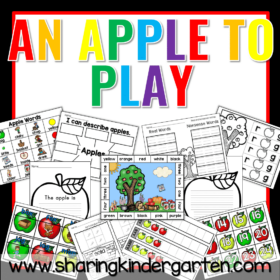
You can peek at some of our learning FUN work centers.
-
-
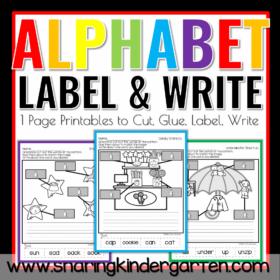 Alphabet Labeling$5.00
 -
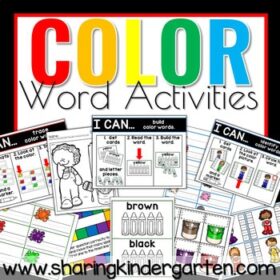 Color Words Activities$5.00
 -
-
 Product on saleMonthly Themed ELA ActivitiesOriginal price was: $88.00.$59.00Current price is: $59.00.
 -
 Product on saleMonthly Math Activities BUNDLEOriginal price was: $80.00.$59.00Current price is: $59.00.
Bonus Centers
Some years I implement bonus learning activities. This is an extra idea for Setting Up Centers for Success. I start these later in the school year, I bring in bonus centers. Bonus centers are not required but if a student completed them, they earn a bonus prize. These centers are usually harder and I do not offer assistance to students to complete these.
Bonus activities include making word families with magnets, sight word searches, or another more difficult task. This is a great way to accelerate learning for those kids who always finish their centers early and need an extra push educationally. Each week I post all about my centers in a post called Center Saturday! You can click {here} to get all the Center Saturday posts!

Thanks for sharing your centre set up as well as the pitfalls to keep an eye on. I am starting next term and grateful of advice. How long does it take for your kids to be independent so you can work with a centre on skills?
Julie 🙂
Mrs Stowe's Kinder Cottage
The are independent quickly because they have the correct motivation-play! And I feel 5 year olds still to play every day!
How do you rotate your centers? Do kids get to choose where they go? Is there a checklist they have to check off by friday? How does it work with 4 students at the tables and onky 2 at the fun stations? Thank you! Rifht now I do 4 stations a day but I would lile to do more literacy stations like debbie dillers work stations.
I don't manage a rotation as my centers are free choice. If a student needs to complete a work station, I call them to it. Other than that- it is open. If a student can't handle a play center, they can also be taken out from it. We do centers for 30 minutes a day each day.
I don't quite understand how you use the clips. Do students pick the clip off the center chart then keep it with them at that particular center until they finish? How will you know that they don't go back & do same center?
How long do you work on centers per day?
30 minutes
Is there any issue with students staying in one center the whole time?
They move from center to center as they work.