

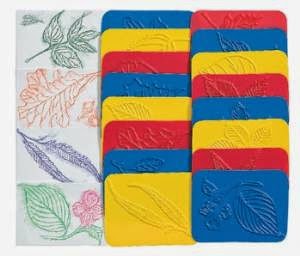
Have you ever tried leaf rubbing? I love using art to tie together science concepts and other skills we are working on. One of the art projects we do each fall involves using these leaf-rubbing plates.
What is Leaf Rubbing?
We talk about how each leaf can tell us the type of tree. Of course, all my little ones enjoy hunting and discovering leaves. We usually find several kinds of trees and their leaves, but it is SO fun to show my little ones leaves from VERY different trees, too.
Using these leaf-rubbing templates helps my students learn about leaves that they might not be near us.
I posted this idea onto my Facebook page and an AWESOME teacher gave me a BRILLIANT idea… she said she makes those cool melted crayons in seasonal fall colors for these rubs. WHY DIDN’T I THINK OF THAT???
Well, I had to try it. So let me walk through the process with you on how to make these crayons for Leaf Rubbing.
1. I started by separating the fall colors from my old crayon collection.
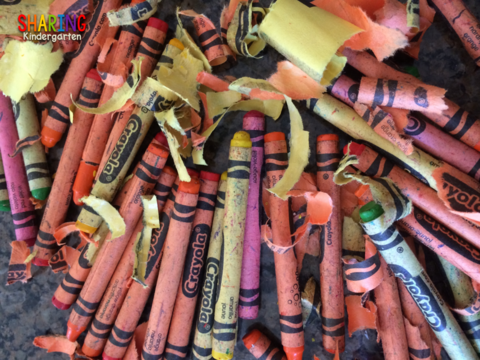
2. I collect all those old crayons into a large baggie from last school year so I dug into that stash. I pulled out all the yellows, oranges, a few reds, and even fewer greens. And then I started to peel them.
This was honestly the hardest part. It took quite a while to peel apart that many crayon wrappers.
3. Next, I took a sharp knife and cutting board to chop up the pieces.
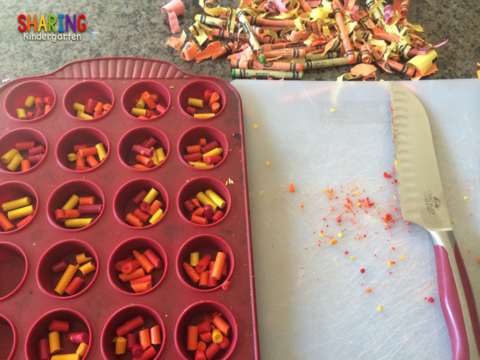
4. I put several colors in each mini muffin section. I happened to use my silicon pan, but I don’t think it makes a real difference. I read online to put a lot of crayon bits into each area because they will cook down, so I filled each section as much as I could.
5. Then I baked them in the oven on 275 for 10-13 minutes.

{Yuppers… I even spilled some… it happens.}
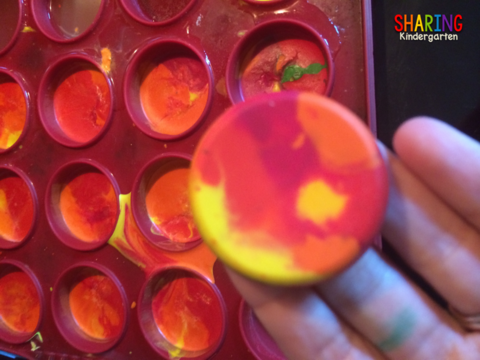
Once the crayons melted down, I took them out and let them cool. They easily popped out.
WOO HOO… Now they are the PERFECT sized, festive crayons for leaf rubs.
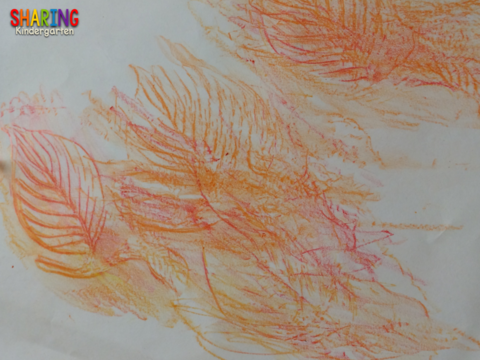
Look at these “action shots” of my kids creating awesome leaf rubs with these crayons.

These crayons fit perfectly into their hands and they loved the colors they created on the rubbing plates. And boy did the crayons last. No broken pieces or made messes! I am confident I will be able to use them for many years.
Well worth the time to peel the crayons. Here are some finished masterpieces.


Thanks for the outstanding crayon tip, Bethany! I heart you!
Goodness, I want to just throw throws plates in my amazon cart and make some seasonal crayons right now, love it!
Next time soak the paper off your crayons! 🙂 Great post!
What k kiddo doesn't love tearing paper off the crayons…I have some professionals this year! Enlist the kiddos help to knock that task out!