

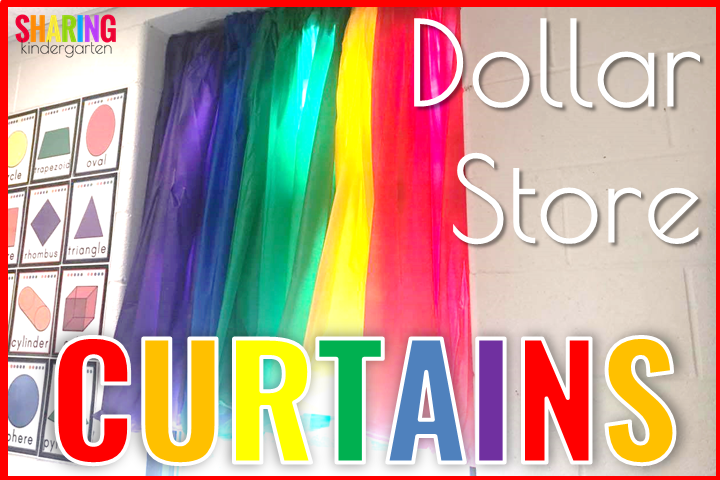
Have you seen this Dollar Store Curtains hack?! A new classroom with windows means finding an awesome solution for curtains! A sweet teacher offered up a dollar store curtain hack I knew I had to try! Check out this Dollar Store Curtain Hack that will make your pocketbook look fat while keeping your classroom cool.
What You Need for Dollar Store Curtains
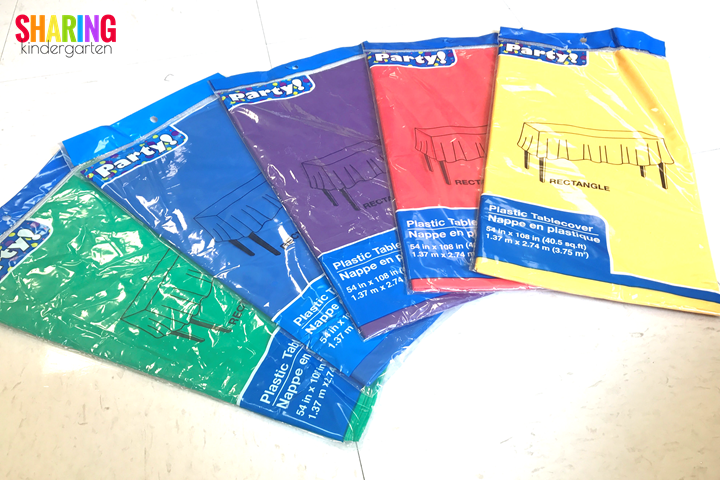
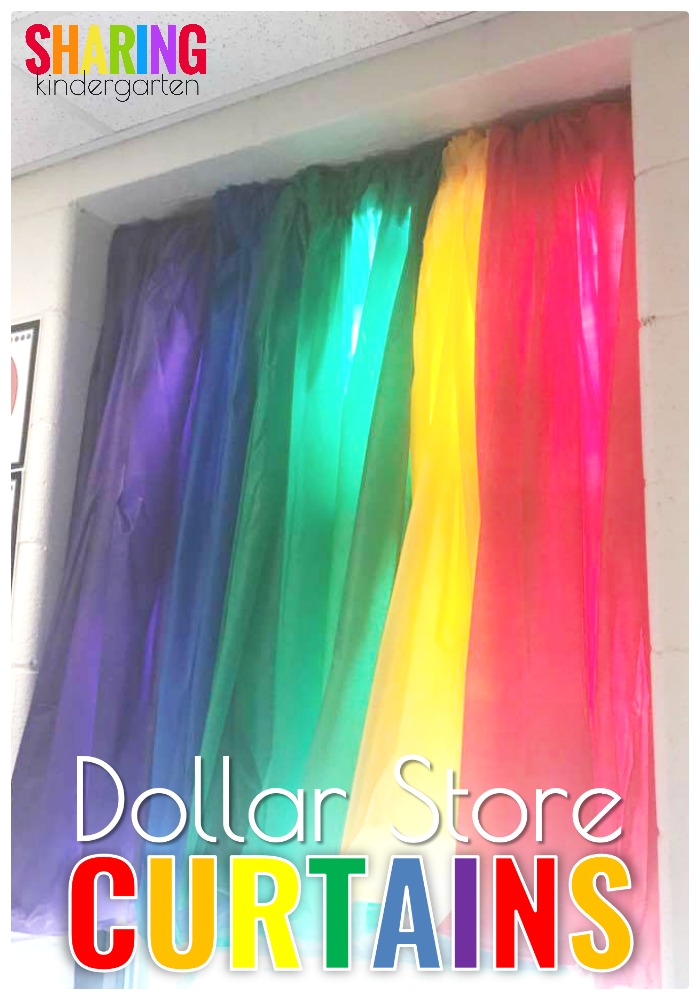
Buy Dollar Store tablecloths. I chose a rainbow of colors since the black and primary color is the theme of my classroom. (You can see my whole classroom design here.) I needed 5 curtains per window. I bought extras just in case. Each package of table clothes costs $1, bringing the total to $5 a window or $10 total before the tension rod. (They didn’t have a great orange color, so I opted to skip that color.)
You will also need a tension rod to fit your window. Since I have cinder block walls, I opted for this black shower curtain rod from Amazon. I wanted the thicker rod since I had planned something different for this window originally. You can find cheaper and thinner tension rods around as well. I liked this thinner version as well.
-

-

-
 Product on saleBack to School BundleOriginal price was: $29.00.$20.30Current price is: $20.30.
Decide on your length
Decide how much of the window you need to be covered. The plastic tablecloths I got were rectangular. Use the shorter part to hang the tension rod to create a longer curtain. Use the longer part to create a shorter curtain. You can also trim the tablecloth to make it any shape in between.
Since I still desired lots of natural light, I chose to attach the longer end of the tablecloth to my tension rod to create a shorter window covering.
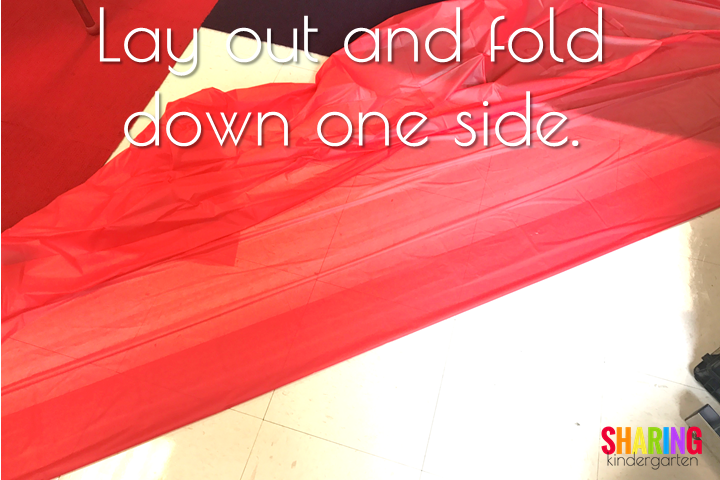
Prepare the tablecloth for Dollar Store Curtains
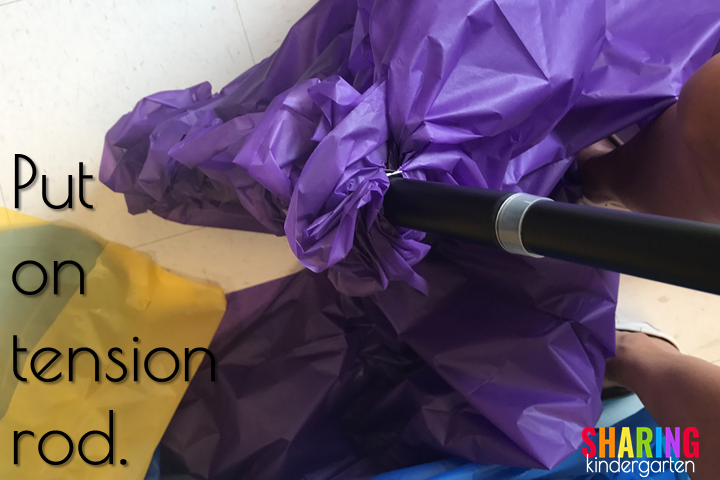
Lay out the curtain. Fold down the side you want to attach to the tension rod. Make sure you fold down the whole side to make it even. Since I used a thicker tension rod, I needed a few inches of space so the rod can fit inside it. Keep your tension rod size in mind when folding.
-
 Color Words Activities$5.00
 -

-

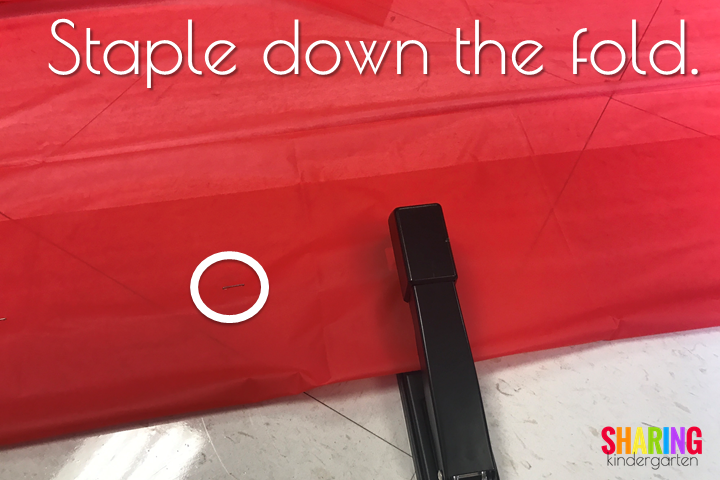
Staple down the fold
Take a stapler and staple it down the fold. Apply as many as you care to. I chose to apply a staple every few inches. This method will go quickly and easily. Fold and staple each tablecloth you desire to use. Notice the white circle shows you where another staple was placed.
Assembly of Dollar Store Curtains
Stand up and put one side of my tension rod on the ground. Feed the pocket you created with the tablecloths and stapled it through the rod. Push down on the plastic curtain slightly to make room for more!
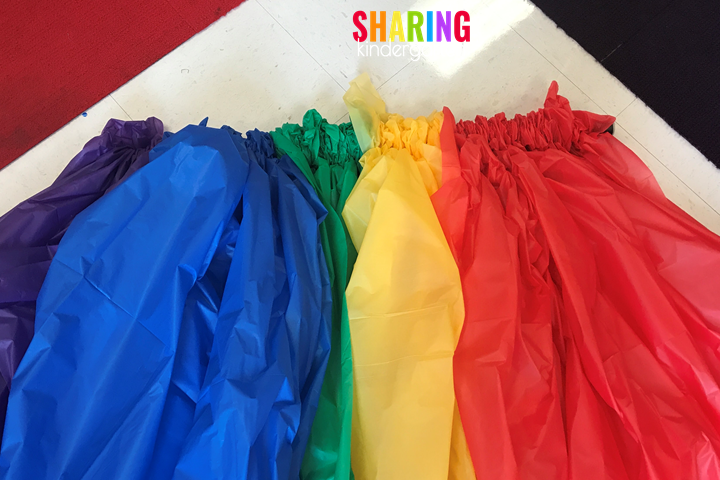
Continue with the next color and so on. You can easily add more or fewer tablecloths depending on how full you desire your curtains to be. These plastic tablecloths still let in light and if you use fewer tablecloths, I believe you would get more light. If you used more tablecloths, you would get less light.
Here is an image of the assembled curtains on the ground.
Installing the Dollar Store Curtains
Now, I took the tension rod and put it up on the window sill. Since I opted for a thicker shower curtain style, this took me several minutes to adjust the length and get it tight in the space. Once the tension rod was in place, I fluffed the plastic curtains and spread the colors out to make them even. Since the color greed was in the middle, I made use to use the middle of my tension rod with green and arrange the colors evenly on both sides.
If your curtains are too long, you can also use scissors to trim them up to the desired length.
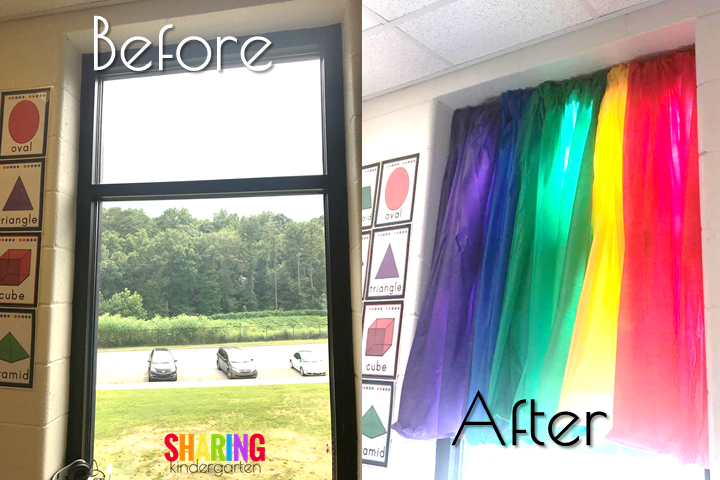
Before and After Picture of Dollar Store Curtains
You can see this before and after image of the curtains in my classroom. Notice how much light still comes through the window. Please note, these are plastic curtains and will not last forever. But these are great ideas to try out for cheap before you commit to a fabric option.

Need more Decor Ideas?
Check out this banner you can customize here.
Learn how to create a banner here.

Here are some more classroom decorating tips. (Click here)
And check out some more Dollar Store Hacks

How well did the stapling method hold up?
It did pretty well. The curtains won’t last two years though. I will have to premake them the next year.
I do this but I use clear packing tape – they lasted about 5 years