

Have you seen these unbelievably awesome interactive classrooms with Bitmojis!? They are a fun, interactive, and highly engaging way to appeal to students digitally. Let me show you a few FUN interactive classroom ideas.
Example of an Interactive Classroom
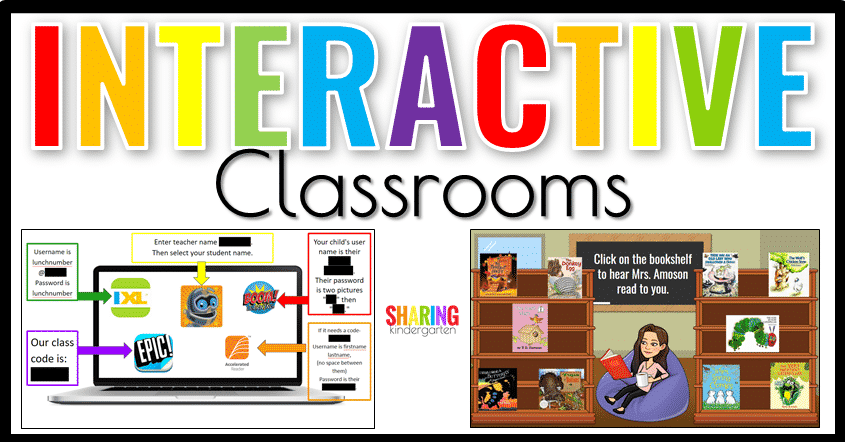
Check out my initial, simple interactive classroom. I made this to aid my family in logging into the correct digital learning site with the right passwords easily. I simply share my interactive classroom with my families. The learner clicks on the images and GOES directly to that location. Click and go. How much fun is that!?!
More Interactive Fun
First, I purposely made a password interactive classroom first because I knew it would be the best way to help my family, but I must warn you… these are addictive for teachers to make and for students to use.
Then, the image does not do this interactive classroom justice so I want you to test it out yourself. Image if you edited these links to contain your school or classroom links for your families.
Reading Room Idea
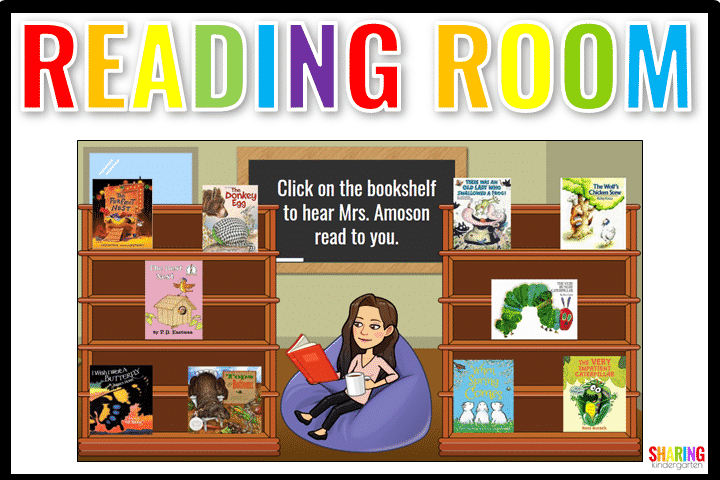
Next, I wanted to play around with this idea more. What about a reading room? Since I read so many books to my class while we were experiencing digital learning, I wanted to reuse those videos. Check out my reading room.
Students can use this interactive classroom by clicking on each book on the bookshelf. They go to a video of ME reading them that title. I was able to do this because so many publishing gave teachers permission to read their titles to their own classes digitally. (I can’t share this with you since that would violate the copyright and I will delete these at the end of June as publishing companies have asked.)
Grab these Ready to Go Digital Ideas

Add Your Bitmoji to an Interactive Classroom
One fun element in these interactive classrooms is adding your Bitmoji. I don’t know whose idea it was, but it wasn’t mine. I saw the idea and loved it. Students love to see you and they love to see the digital you too!
It did take me a moment to figure out how to get my Bitmoji from my phone to my computer. Let me see if I can help you. Here is a big tip… you can download Bitmoji to your computer. Seriously. Google Chrome has a FREE extension you can add to and use. You can grab this free extension here.
Inserting Your Bitmoji
Once you create yourself, you activate Bitmoji and type something in. The extension or app generates run image options. You just have to right-click and save it to your computer. (If you have a PC that is. I don’t have a Mac.) Now your Bitmoji is an image on your computer, you can add it to files easily! In some cases, you can drag your Bitmoji from the small panel to the file you are working on.

How to Make Interactive Classrooms
To show you all the ins and outs of interactive classrooms would take hours. We can start with some basics.
- Open a new Google Slide.
- I delete any text boxes given.
- Click INSERT- IMAGE-SEARCH THE WEB and type in a background you like. (You can add this as your actual background if you prefer but I am trying to make this all simple.)
- Add your Bitmoji. I can find a Bitmoji I like and DRAG it to my Google Slide without saving it.
- Next, I have to add interactive elements to the picture. These can not be on the background but need to be separate elements. You need to go back to step #3 and add images that match what you want to add to your picture. For example, my reading room has book covers. My computer login info has that website’s image.
- When you find an image for this step, you need to make the size smaller.
- Now we need to make this image interactive. Find where you want this image to take your learner. Once you have a LINK to where online your learner will go, copy that link.
Next Steps Creating Interactive Classrooms
- Now, go back to your Google Slides and click on the image you are going to make interactive. Go to INSERT- LINK- then paste your link in the box given. Good Job!
- Keep adding images and links. This is fun but remembers to ensure the images are not too small for little learners to click. Some of them are not great with a computer mouse.
- When you are done, you need to make your Google Slide ready for student use. Go to FILE- PUBLISH TO THE WEB.
- Lastly, you will get a link. Copy that link and share that link with your students. Remember the link you share with students is the one that is the Google Slide PUBLISHED TO THE WEB. Students will see something like what I have below. This is an Animal Cam Interactive Classroom. You click on the science “posters” to visit that animal cam.
Finally, you are ready to dive into the addictive and fun world of Interactive Classrooms with Bitmojis. I know you and your students will love it.
If you love this… you can learn more here!
AWESOME, thanks for sharing this idea!!!! I don’t completely understand how to set it up but I’m looking forward to giving it a try as soon as one of my kids can help me, LOL! Thanks again, stay healthy and sane!
Mary would you make a video on how to link a bitmoji classroom into Seesaw, please?